I’ve merged in some significant updates to the NanoBLESensors project. Hop over to GitHub to check them out.
DHT11 Temperature and Humidity Sensor and the Arduino Nano 33 BLE
I’ve created a new simple Arduino sketch using a variety of Temperature/Humidity sensors. https://github.com/tjpetz/EnvironmentSensorTests. Of note in this simple example is using the DHT11 sensor with a Nano 33 BLE Sense board.
Recover Synology rsync backup jobs
I recently upgraded a very old Netgear ReadyNAS device to a new Synology DS-420+ at a remote location.
The main use of the old ReadyNAS was an a rsync target for backing up my main Synology rack station. I have about 2.5TB of rsync’d files. I wanted to reuse the existing rsync files to avoid the several months necessary to build a new backup.
I thought I could just repoint the existing Hyper Backup jobs on the Synology rack station. This did not work as I couldn’t reset the name of the share where the files were to be backed up to. I also tried building new jobs using the targets of the copied files but this would error out because HyperBackup would report that files already existed in the target directories.
To work around these issues what I was able to do was create new rsync single copy backup jobs in HyperBackup with the same source as the existing jobs but pointing to new backup locations. I then started the backup jobs. I then canceled them shortly after they started. Once fully canceled I copied the old rsync files into the new backup locations. I set the file ownership of these files to the same account used to run the rsync. Once I did this I could restart the HyperBackup jobs and they detected the existence of the files. This saved months of rerunning HyperBackup to fully rebuild the backup images.
SWD Breakout and Breadboard for Nano 33 BLE Sense
The Arduino Nano 33 BLE (Sense) and the Nano 33 IoT expose SWD pads on the bottom of the board. These pads expose the SWD interface that enable debugging when used with an SWD compatible debugger such as the Segger J-Link Mini EDU (https://www.segger.com/products/debug-probes/j-link/models/j-link-edu-mini/).
The pads on the bottom of the Nanos are very small (and as we’ll see later quite fragile). Normally you would use some form of test fixture and pogo pins to connect to the pads. I don’t have that. Some approaches show soldering dupont wires to the pads and then connecting to the J-Link via and adapter.
I’ve used a solderless breadboard with my Nano 33 BLE Sense and an Adafruit SWD Breakout Board (https://www.adafruit.com/product/2743) to build a debugging and breadboard setup.
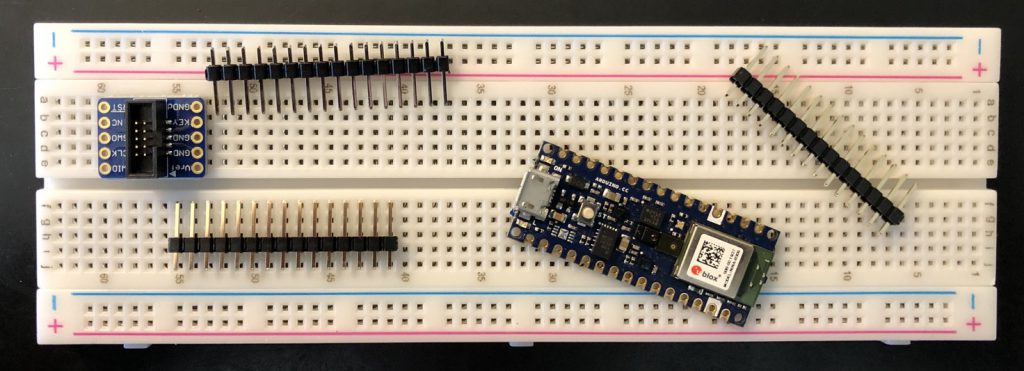
The SWD debugging interface needs GND, the 3.3v Reference, SWCLK, SWDIO, and RESETN. All these signals are available on the bottom of the Nano board. To minimize the number of wires to solder I decided to pull SWCLK, SWDIO, and RESETN (turned out to be a bad idea) from the pads.
Step 1 is to solder the wires to the Nano.
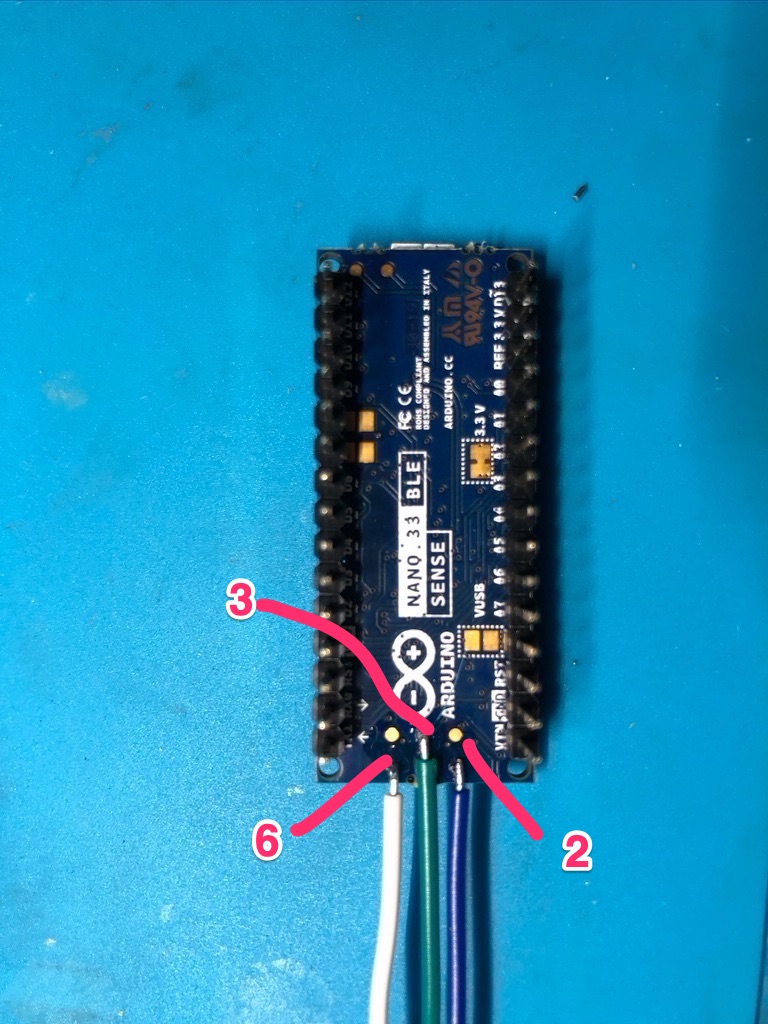
Pin 2 (Blue) = SWDIO
Pin 3 (Green) = SWCLK
Pin 6 (White) = RESETN
Applying some hot glue (should) help keep the wires in place.
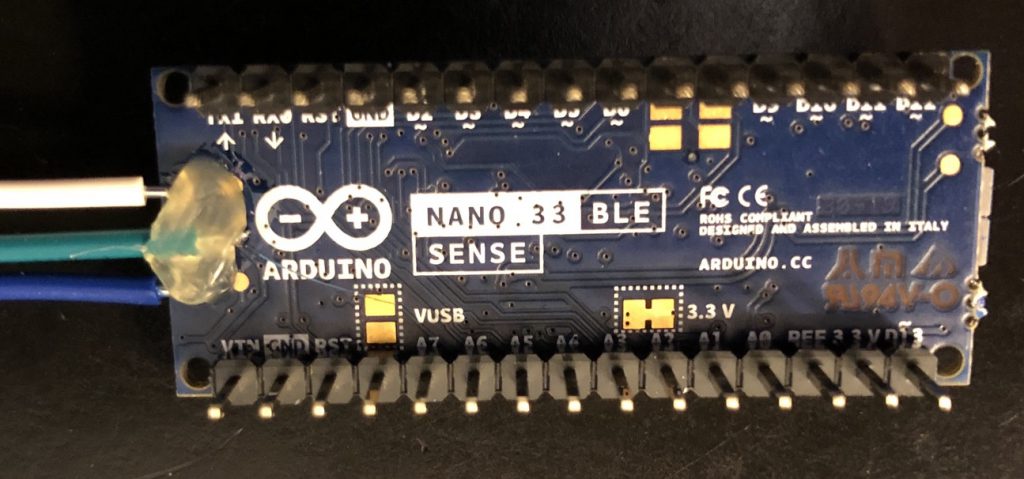
Now we start assembling the solderless breadboard. Here we’ll wire the 3.3 volt reference to Pin 2, pickup ground from Pin 14. We’ll run the wires down the central channel to maintain clearance under the Nano.
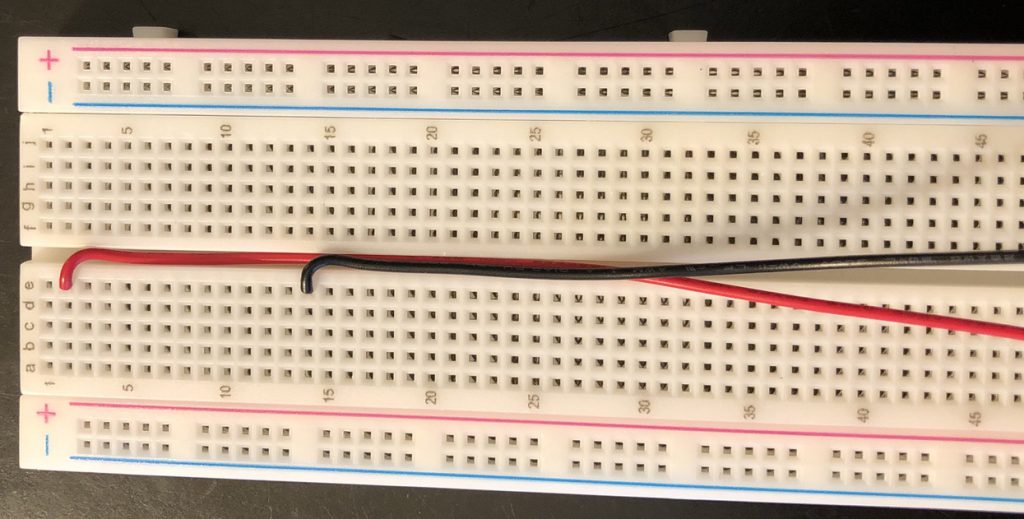
Now we start to layout the board with our wires.
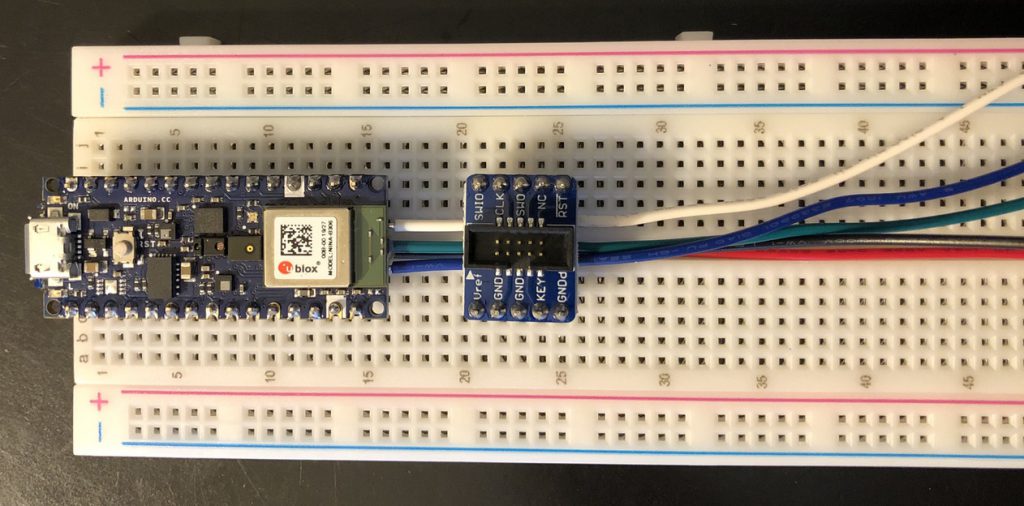
We’ll run the wires so they are neat and go under each board.
While assembling, the White Wire, Pin 6 (RESETN) ripped off the board 😞 A most unhappy moment. I was being very careful while stripping the wire but it must have slipped. Reviewing the board and the photos the hot glue was probably not making sufficient contact with the board over the white wire.
While reviewing videos on repairing PCBs I decided to go double check which wire was ripped off. At that point I realized that it was the RESETN and that signal is also available on Pin 13 of the Nano header. Rather than attempt to repair the board (for which i don’t really have the right tools) I decided to simply take the RESETN signal from the header.
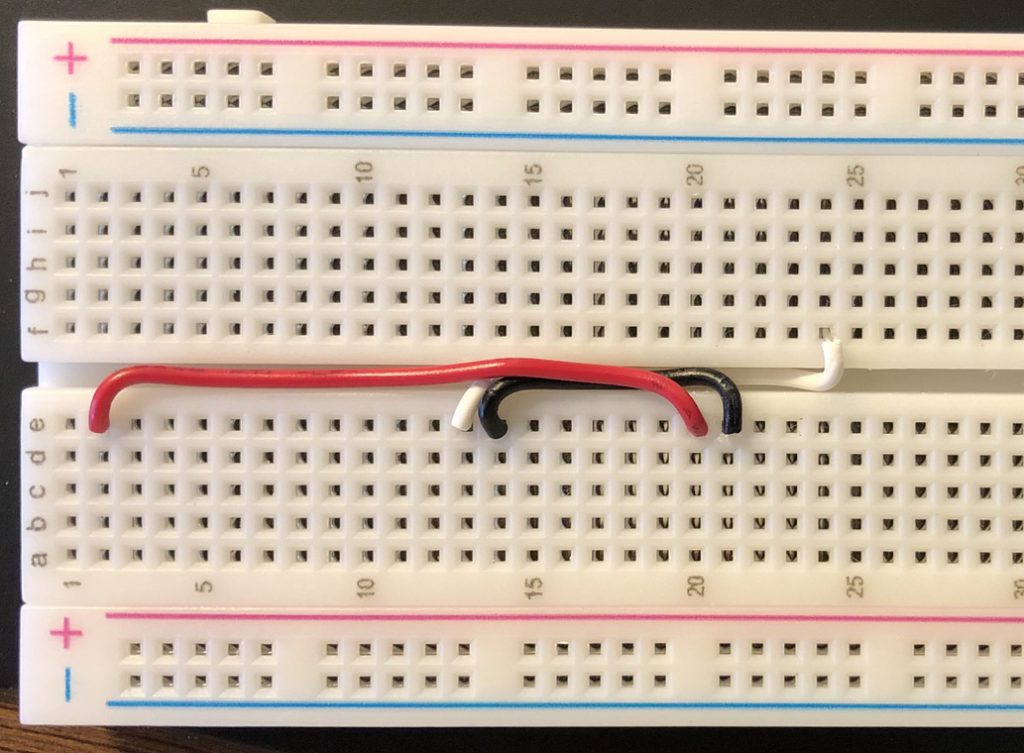
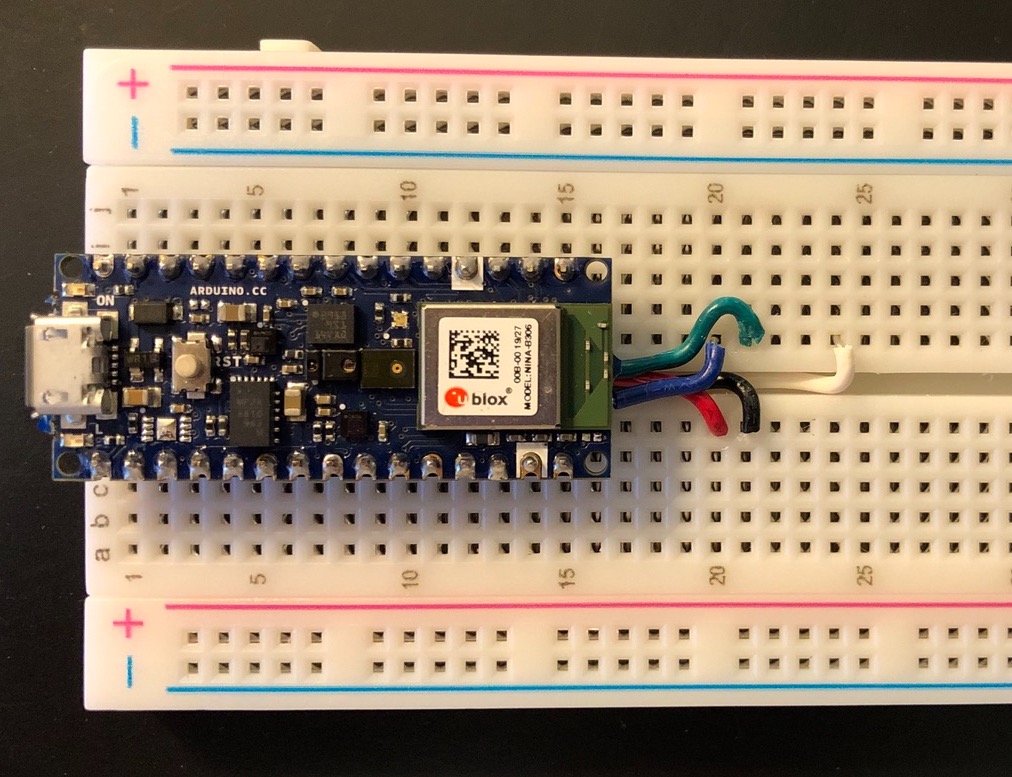
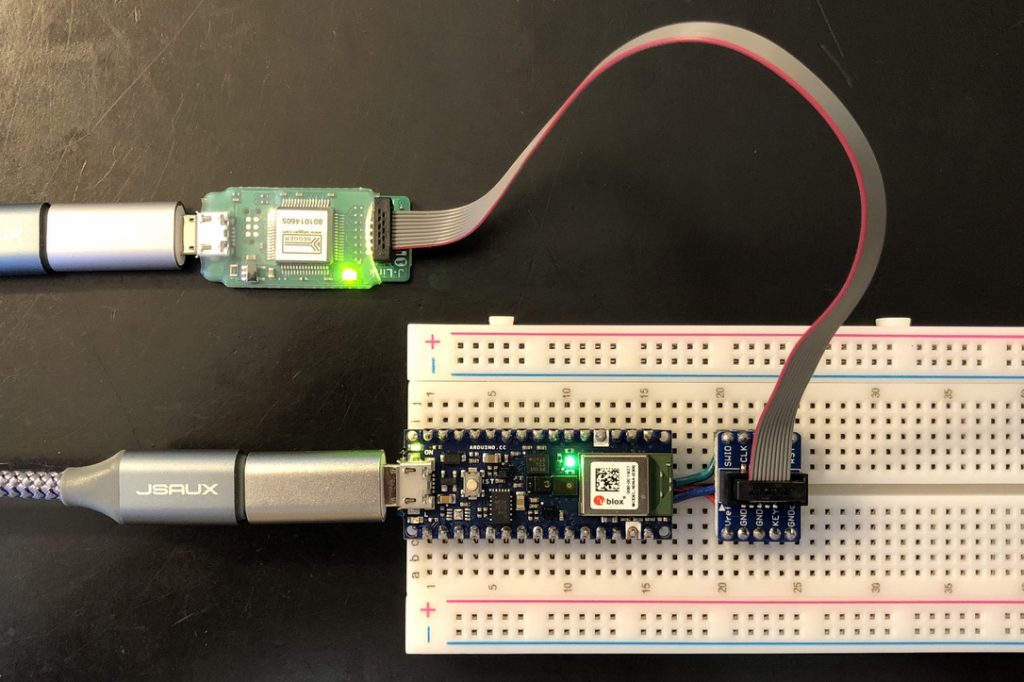
The Nano is then placed on the board the SWCLK and SWDIO are carefully routed to their pins on the breakout board.
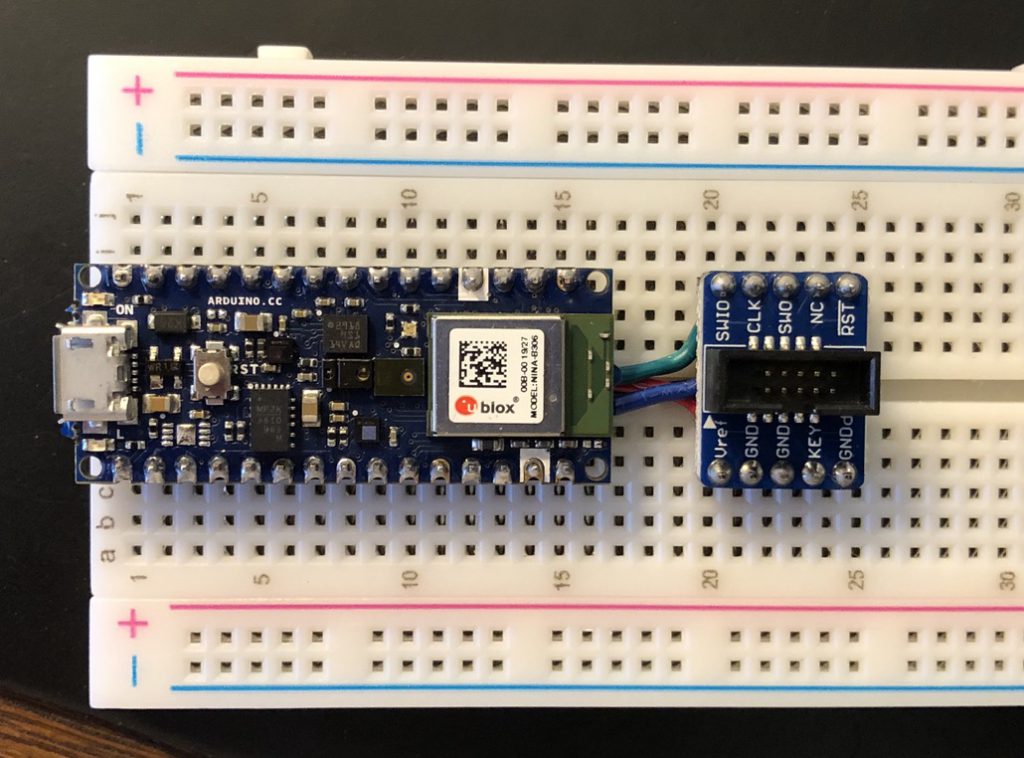
The breakout board may now be placed on the breadboard.
Finally we can now connect the Segger J-Link Mini EDU.
Resolution on Bind9 on NFS
After a good bit of investigation and thinking… the problem with bind9 has nothing to do with bind9. The problem was a mismatch between UIDs between the Synology NAS server and the bind account on the pi. As I was using sec=sys for authentication all the authentication is based on UIDs. On the pi bind has a UID of 109. There was no account on my Synology NAS with a UIDs of 109. Hence the access was denied by the NFS server.
To continue using NFS for the root filesystem I will need to either run in an insecure configuration: you can map every single vid on the client to the admin account on the Synology and then grant full access to the files on the Synology. However that means every account on the pi would end up having full admin access over everything. Certainly not a very good idea. Or alternately I’d need to manage ALL accounts centrally on the Synology for all the pi’s. This seems like a bit of an overkill in complexity.
To avoid the complexity I’m going to use iSCSI for the root filesystem for each pi. I’ll probably use NFS for common shares such as home directories and where I want to share docker images.
This is a good concise guide for configuring iSCSI on a pi for booting: https://www.domoticz.com/forum/viewtopic.php?t=28797 Note, it does assume some familiarity with iSCSI. Assuming you have that familiarity it’s a really good short guide.
I decided against using the script to switch between SD and iSCSI booting included in the article. For the few times I may need to revert to SD booting I’ll user a different SD or simply copy the cmdline.txt and config.txt files from their original configuration.
Trouble with Bind9 on a Pi with NFS root
I got a new Raspberry Pi 4 as I’m looking to consolidate some of my old Pi’s and clean up my servers. To avoid issues with wearing out the SD cards I mount the root file system off an NFS NAS storage server.
Unfortunately I’ve hit a problem with installing Bind9 using the defaults when mounting root via NFS. When starting Bind9 I get the error
named[5466]: working directory ‘/var/cache/bind’ is not writable
However, the /var/cache/bind directory is fully writable by the bind account.
Running a few test I verified that the exact same configuration works when the root filesystem is on the SD card. It seems this issue is related to the chroot that the bind9 runs in by default. If I edit /etc/defaults/bind9 and remove “-u bind” from OPTIONS then bind starts. However, its obviously running as root. I’d prefer to have it run as bind.
So far poking around at google hasn’t identified the specific issue. I’m pretty sure it’s somehow related to using chroot on an NFS mounted filesystem.
I’ll post an update if/when I figure out the issue. In the meantime if you hit the same problem you can always run as root 🙁
BLE and WiFi on Nano 33 IoT
I’ve put together a simple demo project of using both the BLE and WiFi radios on an Arduino Nano 33 IoT. Note, as there is only 1 radio you cannot use BLE and WiFi simultaneously. You can use one at a time, the order of how you make the various calls is important. Check it out on GitHub in SetWiFiPoc.
New Arduino Project
I’m working on tracking down and resolving a humidity problem in our home. While I have some basic measurements of humidity through our Nest Thermostat and a Canary device I want broader coverage so I can measure localized problem areas. The relatively new Arduino 33 BLE Sense looks to be a great device to meet my needs.
I’m creating a simple network combining BLE (Bluetooth Low Energy) and WiFi. I’m planning to use an Arduino 33 BLE Sense to measure the environment. the Arduino 33 BLE Sense doesn’t have Wifi. I’m planning to use an Arduino 33 IoT to act as a “gateway”, polling the Sense for measurements and periodically publishing them to an MQTT broker. The MQTT broker will be Mosquitto running on a Raspberry Pi.
I’m planning to use NodeRed to pull the message off MQTT, store them in an Influx db, and then graph the results in Grafina. I plan to do this all in Docker images on a Raspberry Pi.
This project will evolve over time. I will be publishing the code as it evolves over on Git Hub. I plan for this to be a bit of an example of how I incrementally develop systems, therefore I’ll be publishing rather raw and unpolished code in commits on GitHub.
If you’re interested follow along on GitHub at https://github.com/tjpetz/NanoBLESensors
Upgraded NetworkBrowser to Xcode 10
I upgraded NetworkBrowser to Xcode 10. The biggest change is in starting to internationalize the application. With Xcode 10 there is a big focus on internationalization (this is a very good thing). But with this focus comes some warnings for layout builder. I found that I could resolve most of the issues after viewing this WWDC 2018 video Creating Apps for a Global Audience and using the stacked layout view.
Configure Asus AC-68U Router VPN
The Asus AC-68U (like many routers) supports VPN functionality with the OpenVPN SSL based VPN software. Out of the box the VPN is very simple to configure. However, as delivered it uses quite a weak self signed certificate by Asus. Additionally because of the way the default certs are configured it really only securely supports a single client.
I searched the web and the documentation but didn’t find a good tutorial on configuring the router with your own certificates. With some trial and error I was able to work out how to configure the system with my own CA and Certs. This tutorial describes the steps I took to configure the system. In this tutorial I assume you have your own CA and some basic familiarity with CAs and Certs.
As I have no requirements for externally trusted certificates I have setup my own CA on a Raspberry PI using OpenSSL on my network. I followed this tutorial to configure the CA. It’s also a very good tutorial for getting up to speed with OpenVPN from scratch.
With the version of OpenVPN on the Asus I’ve noted a few particular settings that are not necessarily the same as other OpenVPN versions. In particular the server side certificates must be market with the server attribute and the client certs must be marked with the client attribute. (Note, the Asus CA seems to only generate client certs with the name “client” which means you can have only 1 unique client and cannot use the different client settings in the admin console.) This was the part that required trial and error because it didn’t become clear that these restrictions were in place until after my original certs were installed.
Configure your CA
Add sections to your CA configuration file to enable the creation of Server and Client certs. In this case we just need sections and set the nsCertType parameter. Adding each section separately allows us to create server only and client only certs required by Asus.
[ server_cert ]

# Use this section to sign a cert that is authorized only for SSL server use.

basicConstraints=CA:FALSE

nsCertType = server

nsComment = "OpenSSL generated certificate - server"

subjectKeyIdentifier = hash

authorityKeyIdentifier=keyid,issuer
[ client_cert ]

# Use this section to sign a cert that is authorized only for SSL client use.

basicConstraints=CA:FALSE

nsCertType = client

nsComment = "OpenSSL generated certificate - client"

subjectKeyIdentifier = hash

authorityKeyIdentifier=keyid,issuer
Create the server certs
Create a certificate request. Note, this does not need to be created as root. For this example I’ve created the cert with 1024 bit key. You should consider using 2048 for greater security. In the examples that follow I’m using some very generic names. You’ll want to select names more meaningful to your particular configuration.
$ openssl req -newkey rsa:1024 -nodes -out test1.csr -keyout test1.key

Generating a 1024 bit RSA private key

...........................................++++++

...++++++

writing new private key to 'test1.key'

-----

You are about to be asked to enter information that will be incorporated

into your certificate request.

What you are about to enter is what is called a Distinguished Name or a DN.

There are quite a few fields but you can leave some blank

For some fields there will be a default value,

If you enter '.', the field will be left blank.

-----

Country Name (2 letter code) [US]:

State or Province Name (full name) [Pennsylvania]:

Locality Name (eg, city) [Blue Bell]:

Organization Name (eg, company) [TJPetz CA]:

Organizational Unit Name (eg, section) []:

Common Name (e.g. server FQDN or YOUR name) []:test1

Email Address []:test@test.com

Please enter the following 'extra' attributes

to be sent with your certificate request

A challenge password []:XXXXXXXXXXX

An optional company name []:
Now sign the cert using the CA. Note, this needs to be run as root.
$ sudo openssl ca -config /etc/ssl/openssl.cnf -notext -in test1.csr -out test1.crt -extensions server_cert

Using configuration from /etc/ssl/openssl.cnf

Check that the request matches the signature

Signature ok

Certificate Details:

Serial Number: 21 (0x15)

Validity

Not Before: Oct  1 16:42:30 2016 GMT

Not After : Oct  1 16:42:30 2017 GMT

Subject:

countryName               = US

stateOrProvinceName       = Pennsylvania

organizationName          = TJPetz CA

commonName                = test1

emailAddress              = test@test.com

X509v3 extensions:

X509v3 Basic Constraints:

CA:FALSE

Netscape Cert Type:

SSL Server

Netscape Comment:

OpenSSL generated certificate - server

X509v3 Subject Key Identifier:

37:AA:5C:C4:7C:4F:57:7B:EE:7A:E9:20:1F:85:14:CB:E6:7A:2D:1A

X509v3 Authority Key Identifier:

keyid:8E:89:C0:C6:FA:D2:C9:CA:9E:80:9F:D7:F4:7A:B9:C6:64:11:BB:50

Certificate is to be certified until Oct  1 16:42:30 2017 GMT (365 days)

Sign the certificate? [y/n]:y

1 out of 1 certificate requests certified, commit? [y/n]y

Write out database with 1 new entries

Data Base Updated
The server cert is now available in test1.crt. View it’s attributes to confirm it was correctly created.
$ openssl x509 -in test1.crt -text -noout

Certificate:

Data:

Version: 3 (0x2)

Serial Number: 21 (0x15)

Signature Algorithm: sha256WithRSAEncryption

Issuer: C=US, ST=Pennsylvania, L=Blue Bell, O=TJPetz CA, CN=bbsrv01.home.tjpetz.com/emailAddress=admin@tjpetz.com

Validity

Not Before: Oct 1 16:42:30 2016 GMT

Not After : Oct 1 16:42:30 2017 GMT

Subject: C=US, ST=Pennsylvania, O=TJPetz CA, CN=test1/emailAddress=test@test.com

Subject Public Key Info:

Public Key Algorithm: rsaEncryption

Public-Key: (1024 bit)

Modulus:

00:e3:b6:a2:11:b4:d6:ea:b3:4f:c0:a4:2b:3e:bc:

e9:ab:e3:c0:63:b9:e1:ca:ed:d5:44:51:00:e6:06:

e5:5b:ca:38:26:b1:ab:b8:ab:11:dc:ac:f0:15:a3:

7e:0f:57:eb:8d:d5:d1:6f:9d:c5:d6:ab:02:ac:a5:

81:00:e3:0a:72:90:50:d1:c4:86:e1:fc:e4:d5:29:

c7:cc:04:67:98:a3:8d:73:02:1a:67:6b:f5:83:e4:

36:43:44:0c:98:5d:83:6d:52:6e:2c:f2:02:02:e7:

5a:ae:55:f9:b0:66:62:e2:db:71:7d:d7:ee:52:ea:

c5:d9:ff:71:20:04:3d:0b:23

Exponent: 65537 (0x10001)

X509v3 extensions:

X509v3 Basic Constraints:

CA:FALSE

Netscape Cert Type:

SSL Server

Netscape Comment:

OpenSSL generated certificate - server

X509v3 Subject Key Identifier:

37:AA:5C:C4:7C:4F:57:7B:EE:7A:E9:20:1F:85:14:CB:E6:7A:2D:1A

X509v3 Authority Key Identifier:

keyid:8E:89:C0:C6:FA:D2:C9:CA:9E:80:9F:D7:F4:7A:B9:C6:64:11:BB:50
Signature Algorithm: sha256WithRSAEncryption
b0:cb:62:5c:22:42:50:7c:33:b3:21:9c:12:1f:af:4b:dd:00:
99:a9:cc:1c:57:2d:25:04:a0:25:ed:71:21:68:c4:ec:ee:91:
64:94:a6:f1:2f:c0:da:cc:97:a6:92:ac:f0:3e:b9:78:92:c3:
b0:29:7c:93:47:10:fc:63:f9:c1:5a:e7:8f:02:46:c5:ee:e3:
da:8e:6f:e9:7f:1c:3e:15:60:32:59:18:6f:c4:1c:80:dc:b9:
61:6b:0e:4c:cd:04:ee:eb:e3:8d:a4:8f:bb:b3:6a:fa:06:4b:
8c:ae:7e:a1:e2:72:bf:05:34:55:1b:4a:a5:51:83:e3:a3:21:
da:45:f2:54:f1:06:3f:9b:1c:ea:2d:25:50:ce:e0:47:59:aa:
6e:b9:48:b4:aa:fd:48:2c:9e:98:b7:08:4c:f1:45:d1:61:7e:
c8:29:f2:46:5e:52:96:83:c2:fa:87:46:b5:d9:7e:27:25:e8:
f7:30:d0:7b:12:ef:c7:18:39:40:4c:52:4b:33:e9:f9:8a:b9:
24:a1:90:cc:6a:2d:85:18:ee:fb:11:8e:55:d1:d1:82:0c:c1:
91:b5:8b:c7:ab:94:9c:f1:dd:e7:12:54:f7:59:2c:fd:f7:d0:
d1:84:33:5d:45:23:d2:b8:08:d8:33:b4:d7:bf:c8:1d:28:ed:
80:f0:13:2f:36:66:ce:98:81:23:ac:21:2c:d3:92:12:41:74:
f6:1b:07:7a:77:56:19:3e:76:8c:e3:16:8f:c9:8a:91:93:46:
5d:84:5a:9b:99:c4:20:0e:aa:70:2d:e6:a5:b1:cb:6e:8c:6b:
16:c0:d2:21:f2:f2:8a:d5:28:a9:2a:d9:b6:ba:45:a5:e8:1a:
30:44:4e:53:db:ff:fe:d7:fd:31:a0:0e:db:48:b4:eb:24:94:
04:bd:63:51:4b:06:95:08:64:af:1a:23:af:2c:65:fb:d7:b2:
8d:7b:ad:12:3a:61:c0:63:19:de:81:2d:24:e3:44:16:06:99:
f6:1e:53:a5:ec:6c:6e:c2:bf:54:99:8d:23:18:9d:85:39:97:
37:e3:9e:ab:b2:5b:37:b0:78:4e:0a:87:c1:ca:ed:9c:d1:09:
e0:88:34:1a:3b:ac:fe:e9:e0:0f:66:8a:5f:d5:59:a7:ef:b7:
ec:bb:da:64:a9:6c:60:55:e1:0a:ef:20:2a:e3:a4:78:c9:83:
b5:33:18:17:c7:d3:95:30:94:01:22:fc:ab:11:4b:9e:d0:43:
ca:4a:cd:7f:0a:49:44:aa:0d:33:f8:97:1c:d1:63:09:fc:6a:
ae:5a:8f:d0:f9:91:14:1d:75:80:f7:98:7a:33:43:8e:d9:da:
c8:99:6b:0a:b3:7a:35:21
Now we have a server certificate we can use with the Asus router.
Create the Diffie Hellman Parameters
Next we need to create the Diffie Hellman Parameters. This is used to generate the share secret that will be used to encrypt each VPN session.
$ openssl dhparam -out dhparams.pem 1024

Generating DH parameters, 1024 bit long safe prime, generator 2

This is going to take a long time

...................................+............+..........................................................+...........................................................+.+.................+..........+.....................+..........+..........................................................................................................................................................................+............+....................+....+.............................................................................+................................................................+...................................+...........................+................................................................+...................................+.......+....+...................................................+..........+..++*++*++*
Configure the CA and certs in Asus router.
From the VPN menu select Advanced and then follow the link “Content modification of Keys & Certificates” in the Authorization Mode section.
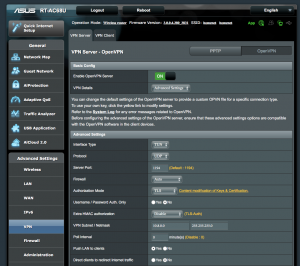
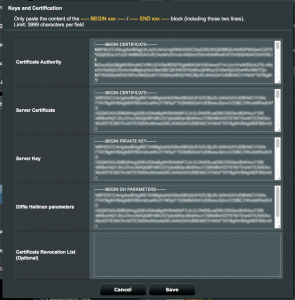
- Paste the public key certificate of your CA into the “Certificate Authority” field.
- Paste the contents of test1.crt into the “Server Certificate” field.
- Paste the contents of test1.key into the “Server Key” field.
- Past the contents of dhparams.pem into the “Diffie Hellman parameters” field.
If you ever need to revoke a client cert you can paste the revocation in the the final field.
Configure the client options
To enable LAN to LAN connectivity you need to enable client specific settings. Select the following options:
- Manage Client-Specific Options = Yes
- Allow Client <-> Client = Yes
- Allow only specific clients = Yes
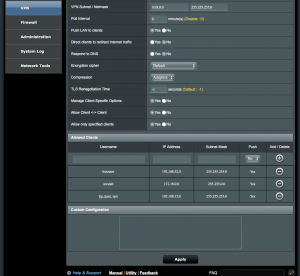
Now configure the client. In this case I have 3 clients configured. The first is another Asus router at another location, the second is a private network on AWS, and the third is my iPad. In each case the IP Address entered is the address of the client network. Note, this will almost always be a private IPv4 subnet. I also set the Push option to Yes to enable the routing tables to be correctly updates when a client connects to the VPN servers.
Add VPN Clients
To add VPN clients we start by creating the client certificates. It’s very important to set the CN of the client cert to the user/client name we enter into the Asus router. In this example the client is names test2. You will probably want to use a more meaningful name for your configuration.
Start by creating the certificate request:
$ openssl req -newkey rsa:1024 -nodes -out test2.csr -keyout test2.key

Generating a 1024 bit RSA private key

................................................++++++

.............................................................++++++

writing new private key to 'test2.key'

-----

You are about to be asked to enter information that will be incorporated

into your certificate request.

What you are about to enter is what is called a Distinguished Name or a DN.

There are quite a few fields but you can leave some blank

For some fields there will be a default value,

If you enter '.', the field will be left blank.

-----

Country Name (2 letter code) [US]:

State or Province Name (full name) [Pennsylvania]:

Locality Name (eg, city) [Blue Bell]:

Organization Name (eg, company) [TJPetz CA]:

Organizational Unit Name (eg, section) []:

Common Name (e.g. server FQDN or YOUR name) []:test2

Email Address []:test2@test.com
Please enter the following ‘extra’ attributes
to be sent with your certificate request
A challenge password []:XXXXXXXXX
An optional company name []:
Then sign the request:
$ sudo openssl ca -config /etc/ssl/openssl.cnf -notext -in test2.csr -out test2.crt -extensions client_certUsing configuration from /etc/ssl/openssl.cnf

Check that the request matches the signature

Signature ok

Certificate Details:

Serial Number: 22 (0x16)

Validity

Not Before: Oct 1 19:06:02 2016 GMT

Not After : Oct 1 19:06:02 2017 GMT

Subject:

countryName = US

stateOrProvinceName = Pennsylvania

organizationName = TJPetz CA

commonName = test2

emailAddress = test2@test.com

X509v3 extensions:

X509v3 Basic Constraints:

CA:FALSE

Netscape Cert Type:

SSL Client

Netscape Comment:

OpenSSL generated certificate - client

X509v3 Subject Key Identifier:

C0:D6:42:7E:8A:4E:E4:E5:7E:66:0D:72:1D:0F:B3:BA:C9:A3:C2:E5

X509v3 Authority Key Identifier:

keyid:8E:89:C0:C6:FA:D2:C9:CA:9E:80:9F:D7:F4:7A:B9:C6:64:11:BB:50
Certificate is to be certified until Oct 1 19:06:02 2017 GMT (365 days)
Sign the certificate? [y/n]:y
1 out of 1 certificate requests certified, commit? [y/n]y
Write out database with 1 new entries
Data Base Updated
Create the client account
Switch back to General mode on the server and then add an account for the client. The Username must match the CN in the certificate. Pick a suitably complex password. However the real security of the connection is ensured by the certificate rather than the password.
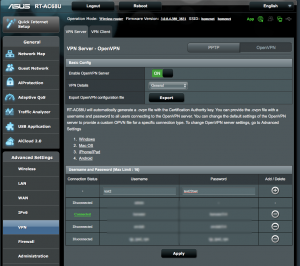
Install the certificates into the client VPN
Access the VPN client router and select OpenVPN on the VPN Client tab. Enter the username and password created in the previous step. Select the option to “Import the CA file or edit the .ovpn file manually.”.
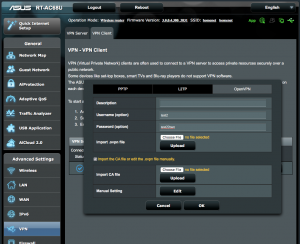
Press “Edit” in Manual Settings where you can paste in the certificates.
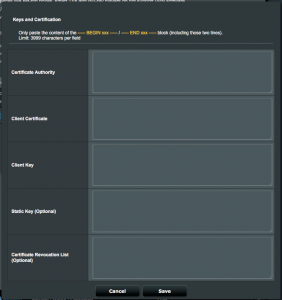
- Paste your CA’s public cert into “Certificate Authority” field.
- Paste the contents of test2.crt into the “Client Certificate” field.
- Past the contents of test2.key into the “Client Key” field.
- You may leave the other fields blank.
If all went well the client VPN should now establish a connection with the VPN server. Review the system error log to resolve any errors if the connection is not successful.